


Room Escape Prison Break puts the player into a jail. It is up to you to figure out how to get out of there. Room Escape Prison Break is filled with difficult puzzles, spooky levels, and challenges.
Room Escape Prison Break can be downloaded in the Appstore. It is also available on Google Play under the name Escape Game: Prison Adventure.
Room Escape Prison Break Walkthrough
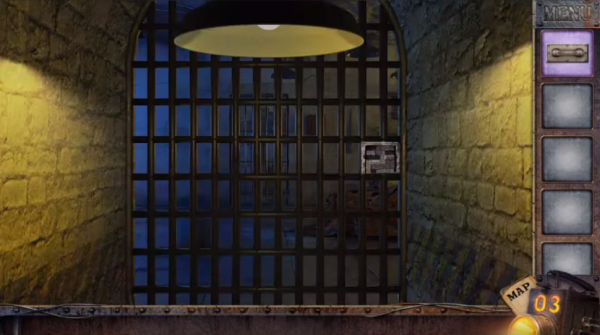
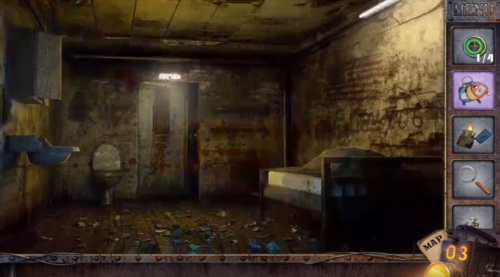
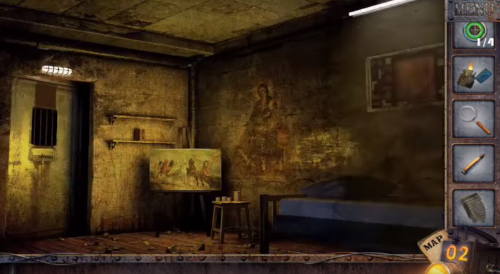
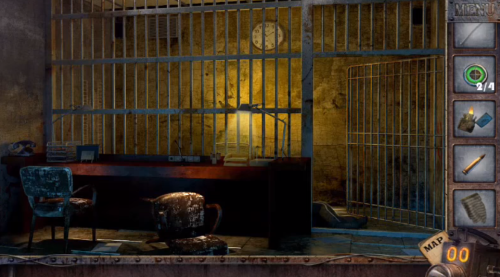
When the game begins, you are in an old and decrepit cell. Before you actually start the game you hear a few terrible sounds, some screaming, and what appears to be a wild animal attacking.
You say that you are innocent and you have to escape. That is when the gameplay begins.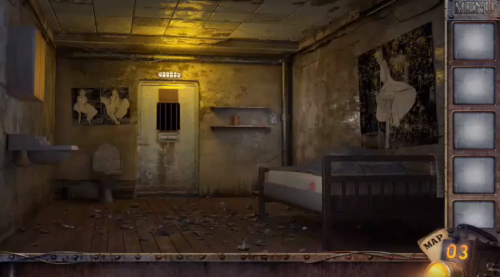
Room Escape Prison Break Level 1
The first thing you need to do is walk over to the cabinet. You will notice that the doorknob is missing. Go back and walk to the shelf, there you will find the missing knob. Once you have opened the cabinet, pick up everything you can.
The items you should collect are the following:
- Box of matches
- Spoon
- Cloth
- Bowl
When you are finished in the cabinet, go to the sink. Place the bowl in the sink and fill it with water. Place the spoon in the bowl. Then take the spoon and use the dark spot on the wall to sharpen the end of the spoon.
After the spoon is sharpened, you are finished at the sink for now. Go to the bed. Use the spoon to unscrew the top and bottom screw on the bed frame. When you finish this, you will collect a piece of metal from the frame.
Next, use the spoon to pry up the wood planks on the floor beside the toilet, you will collect a saw blade. Then do the same thing under the sink. Remove all pieces of wood that are splattered with blood.
Now you are ready to leave the room. Use the piece of metal from the bed frame to break a hole in the floor under the sink where you removed the wood planks. Before you can leave, you need a light source. Use the piece of the bed frame and wrap the cloth from the cabinet around the end. Then take the matches to ignite the cloth for a makeshift torch.
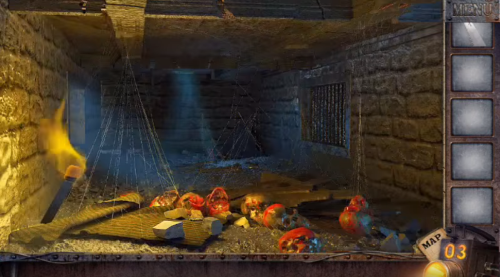
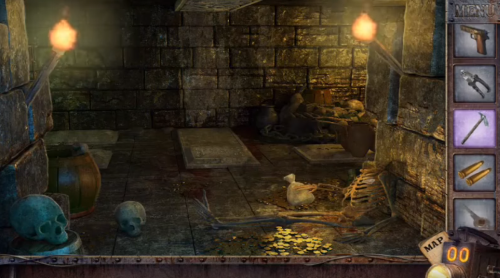
Go to the hole and click on the torch, then click on the hole to drop the torch. Click on the hole again to climb down. Here you will discover a gruesome screen with blood skulls in a cobweb-covered passageway.
 Room Escape Prison Break Level 2
Tap on the skulls, one is wearing a crown. Below the skull is a small rock pile. Remove the rock piles to reveal what looks like a necklace. Take the pendant from the necklace.
Then go to the bars on the right side of the screen. Use the saw blade to cut the first four bars at the top and bottom. Then tap the hole you made to enter the next room.
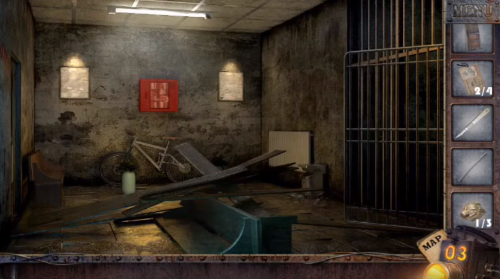
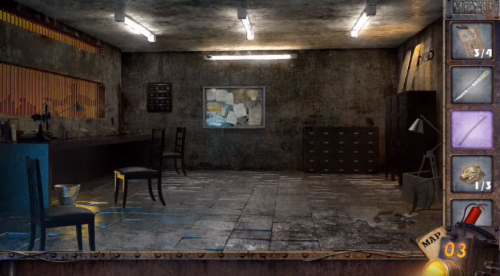
 Room Escape Prison Break Level 3
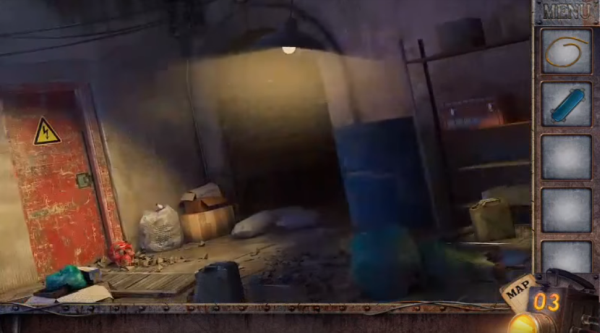
In front of you, slightly to the left is an electrical box, click on this and you will find a piece of paper on top. Take the paper. Go back to the full scene and to your left, zoom in on a board with a lead pipe laying across it. Take the lead pipe and the rock.
In the far right corner near the bottom of the screen, zoom in and you will find a red piece of tubing lodged under a stone. Use the rock and the piece of the bed frame to raise the stone so you can take the tube. Then go to the door in front of you. There you will find a lock.
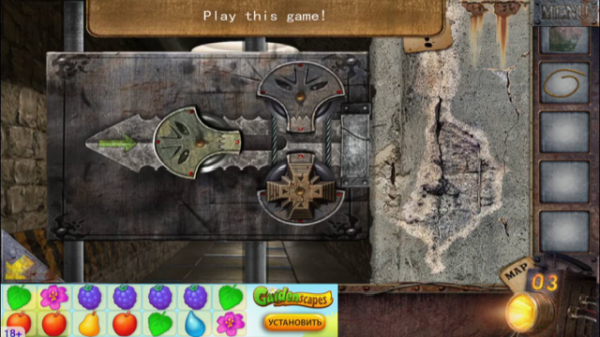 Room Escape Prison Break Key Puzzle
The pendant from the necklace is the missing piece. There are three sections, Top (T), Bottom (B), and Left (L) and 5 pieces (P1, P2, P3, P4, P5). You need to move all of the pieces from the bottom to the top in order of largest to smallest. This is the pattern you need to follow:
- P1 to T
- P2 to L
- P1 to L
- P3 to T
- P1 to B
- P2 to T
- P1 to T
- P4 to L
- P1 to L
- P2 to B
- P1 to B
- P3 to L
- P1 to T
- P2 to L
- P1 to L
- P5 to T
- P1 to B
- P2 to T
- P1 to T
- P3 to B
- P1 to L
- P2 to B
- P1 to B
- P4 to T
- P1 to T
- P2 to L
- P1 to L
- P3 to T
- P1 to B
- P2 to T
- P1 to T
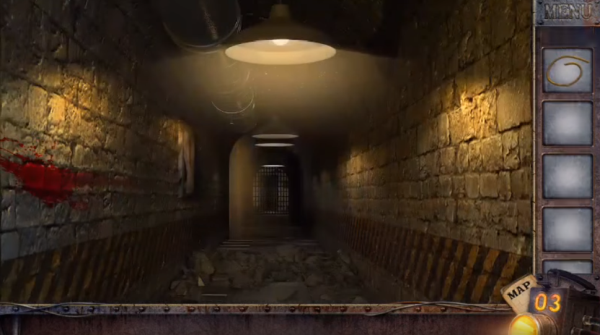
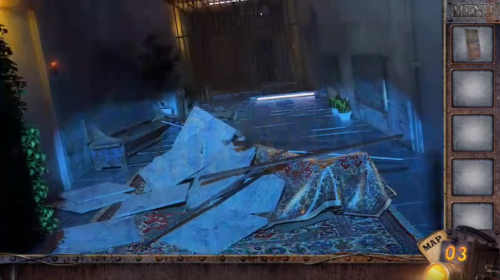
When all pieces are stacked at the top, the door will unlock. Go through the door and you will find yourself in another passageway.
 Room Escape Prison Break Level 4
Once in the passageway, click on the wall to discover a painting of what looks like a cat sitting on a tree limb. But the bottom left corner is missing. Use the piece of paper you found to complete the poster.
Then click on the picture to slide it out of the way. You will see a blue object that looks like a capsule or a small container. Take the object and continue down the passageway.
 Room Escape Prison Break Level 5
You will enter a room with a swinging overhead light. On the shelf to the right side of the screen, there is a red box. Tap it to zoom in and tap it again to open it. You will find more of those blue items. Return the one you found to the empty slot and this will start a mini-game.
There are four blue colored objects in the middle with four gold object on either side. Your task is to make the pattern Green, Green, Blue, Green, from top to bottom. To do this, you have to tap the blue pieces in a certain order to turn them to green and vice versa.
Room Escape Prison Blue Capsule Puzzle
From top to bottom, they are number 1,2,3,4. This is the order to tap them: 2, 4, 3, 1. Then you will reveal a red and blue knob. Take the knob.
When you go back to the full room view, there is a gas can on the right. Tap to zoom in, tap again to take it. Click on the blue barrel and place the gas can on the ground beside it. Then place the tube in the opening in the barrel and use it to siphon out the contents of the barrel. Then take the barrel and go back to the full-screen view.
 Room Escape Prison Break Knob Puzzle
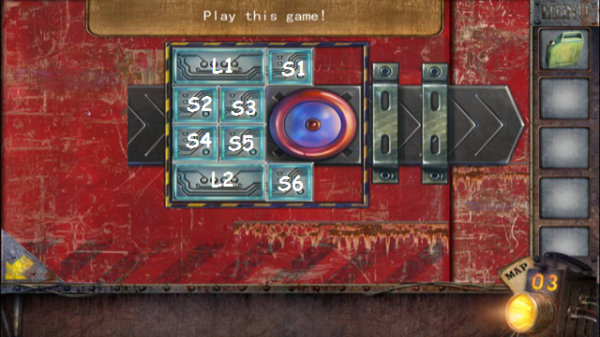
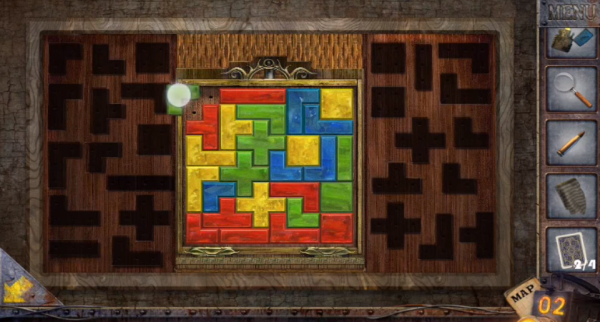
Tap the red door to the left. You the knob that you got from the red chest to activate this puzzle. For this puzzle, you will need to rearrange the tiles so that you can move the doorknob. There are 8 pieces, 2 large (L) and 6 small (S). This is the order to move them:
- S1, slide to far right.
- L1, slide to far right.
- S2t, slide up.
- S4, slide up.
- S6, slide to far right.
- L2, slide to far right.
- S5, slide left, slide down.
- S3, slide down, slide left.
- MOVE KNOB LEFT
- S1, slide down.
- L1, slide right.
- S2, slide right.
- S4, slide up.
- S1, slide up.
- S6, slide up.
- L2, slide right.
- S5, slide right.
- S3, slide down.
- MOVE KNOB LEFT
Once the door is open, tap it to enter the next room.
 Room Escape Prison Break Level 6
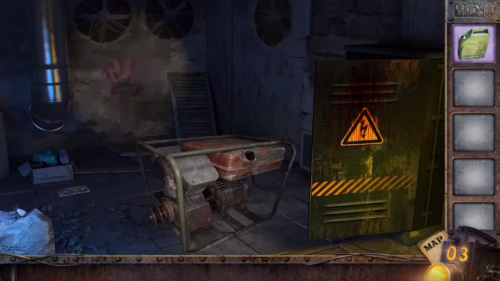
You will see an electric generator in the middle of the room. Poor the fuel you siphoned from the blue barrel into it. A metal object is laying on the floor to the left, pick it up then exit the room.
Tap the entrance to the hallway to continue to the next room.
 Room Escape Prison Break Level 7
Here, you will find yourself standing at a locked gate. You must solve the puzzle to open the gate and continue.
Place the metal object you found in the generator in the puzzle to begin.
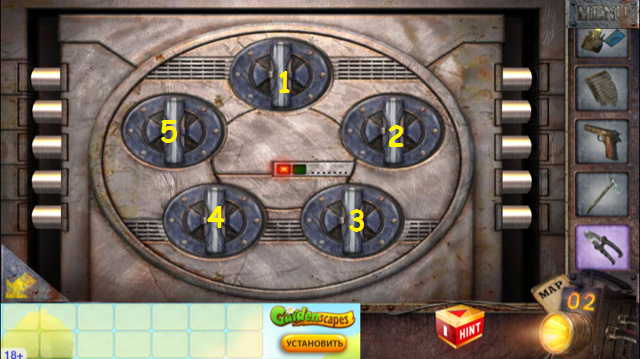
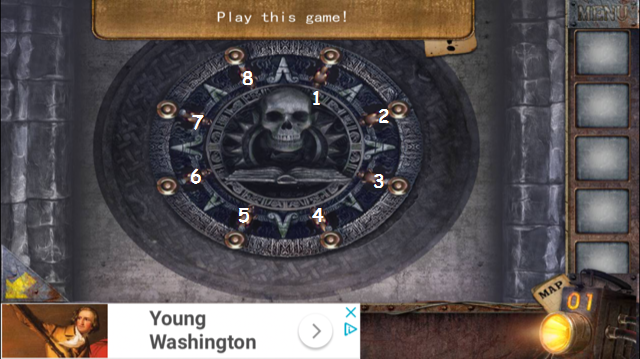
 Room Escape Prison Break Gate Puzzle
- 1 up
- 12 up
- 9 left
- 10 left
- 4 down
- 5 left
- 7 up
- 6 up
- 4 up
- 10 right
- 9 right
- 12 down
- 5 left
- Finished
Once you have solved the puzzle, the gate will open, taking you to the next room.
 Room Escape Prison Break Level 8
You will see a flickering light bulb and talk about how you need to start the generator or the light will go out. There is a fan on the left side of the screen. Unplug it and when it stops spinning, look at the numbers on each of the blades, you will receive a passcode: 9527.
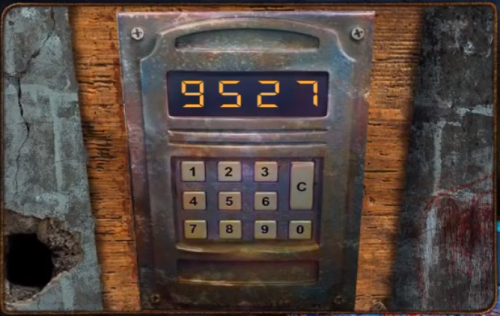
Enter the passcode into the keypad on the wall behind the fan. The keypad will open and reveal two books and a blue ball. Take the blue ball.
Click on the file cabinet near the center of the screen. Search the draws to find another blue ball and a cord used for the generator. Go back to the room with the generator, attach the cord and turn it on.
Once the generator is running, open the green electrical box on the right. Then you will need to solve the puzzle.
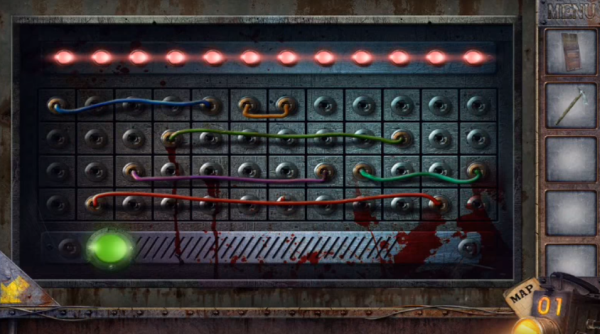
 Room Escape Prison Break Wire Puzzle
You have to connect the wires to the corresponding color to solve the puzzle.
- 7 Left
- 5 Down
- 2 Down
- 1 Right
- 4 UP
- 2 Left
- 1 Down
- 3 Left
- 6 UP
- 1 Right
- 3 Down
- 6 Left
- 1 UP
- 8 to finish
Once the puzzle is solved, a key will drop from the top of the puzzle. Pick it up and exit back to the room. Return to the room with the fan.
On the far left, there is a gate with metal bars. Tap the gate to view the keyhole. Use the key you just received to unlock the gate. Enter the new room.
 Room Escape Prison Break Level 9
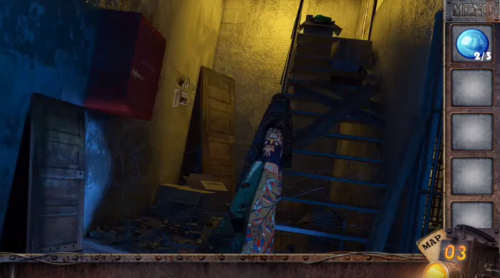
On the ground to the left, there is a door, pick it up. At the back near the center, there is a board with pictures. Remove all of the pictures to find the last blue ball. Take the blue ball and then go back to the full room view.
Tap the screen at the top right corner to reveal a new puzzle. Place the three balls in the empty slots to activate the game.
Room Escape Prison Break Ball Puzzle
To win the game, you have to get the balls in the side with the corresponding color.

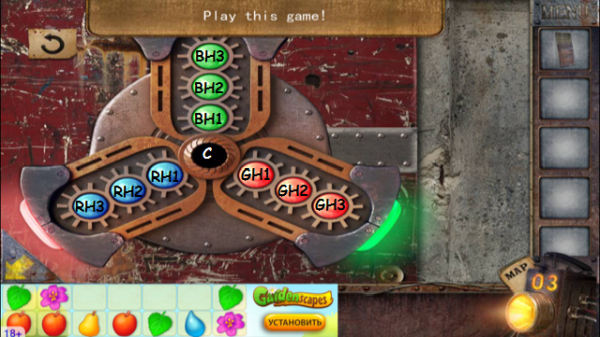
- R1 GH1 to C
- G1 BH1 to GH1
- R1 C to BH1
- B1 RH1 to C
- R1 BH1 to RH1
- B1 C to BH1
- B2 RH2 to C
- R1 RH1 to RH2
- B3 RH3 to RH1
- R1 RH2 to RH3
- B2 C to RH2
- B1 BH1 to C
- G2 BH2 to BH1
- B1 HB1 to BH2
- G2 BH1 to C
- G3 BH3 to BH1
- B1 BH2 to BH3
- G2 C to BH2
- R2 GH2 to C
- G2 GH1 to GH2
- R3 GH3 to GH1
- G2 GH3 to GH2
- R2 C to GH2
- R3 GH1 to C
- G3 BH1 to GH1
- B3 RH1 to BH1
- R2 C to RH1
- B2 RH2 to C
- R2 RH1 to RH2
- B2 C to RH1
- B3 BH1 to C
- G2 BH2 to BH1
- B3 C to BH2
- R2 GH2 to C
- G3 GH1 to GH2
- R2 C to GH1
- B2 RH1 to C
- R2 GH1 to RH1
- G2 BH1 to GH1
- B2 C to BH1
- Finished
Once you have finished the puzzle, a gate will unlock at the top of the stairs. Tap the top right corner of the screen to go into the hallway.
 Room Escape Prison Break Level 10
Look in the laundry basket on the left to find a lab coat with a keycard in the pocket and the paper from the plant. Take the keycard then examine the panel to the left with the red light.
Swipe the keycard to gain access to the room on the left. Enter the room.
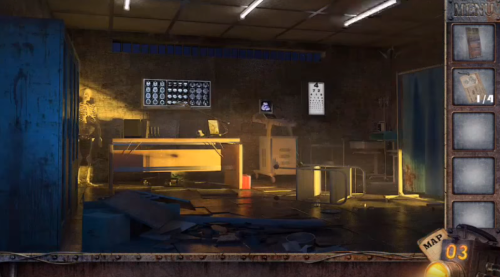 Room Escape Prison Break Level 11
Click on the tray on the right and take a scalpel and a bottle of medicine. Click on the curtain to reveal the feet of a cadaver. Take the toe tag from the cadaver.
Go back to the room where you solved the puzzle with the red, green, and blue balls. On the left wall, there is a red cabinet. The latch is rusted.
Pour the contents of the bottle on the latch to release the latch and open the cabinet. There is a pair of pliers in the cabinet. Take them.
Go back to the hallway and tap the top corner to enter the next room.
 Room Escape Prison Break Level 12
Click on the paper hanging on the wall on the right. There is a piece of paper tucked in the bottom left corner. Take it. Then tap the red box in the center of the screen to solve the puzzle.
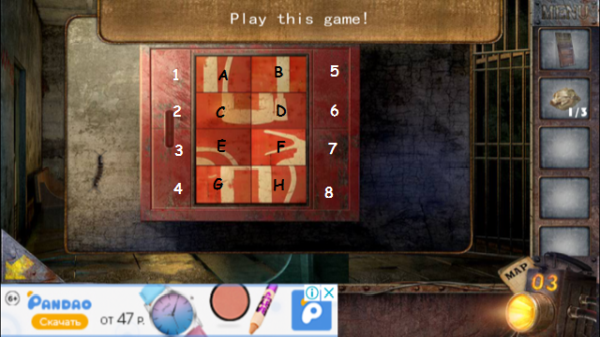 Room Escape Prison Break Fire Extinguisher Puzzle
The image should look like a fire extinguisher.
- 1F
- 2G
- 3B
- 4C
- 5E
- 6H
- 7A
- 8D
When it is open, take the fire extinguisher and go back to full room view.
Now, click on the bike. Use the pliers that you just acquired to cut a piece of wire from the bike tire. Then find the door with the red circle with a line through it. It is in the room with the bike on the far left. Take the wire and the tap the lock to activate the puzzle.
Take the 1st and 5th arrow to bend the wire at that point.

Use the lower cycle arrows to rotate the wire and the arrow pointing to the far left to move the wire further into the lock.
 Room Escape Prison Break Level 13
Once you have entered the room, you will say that the room had been on fire. Once you enter the room, tap the file cabinets on the back wall on the right.
Open three drawers, in the center drawer, you will find a book. Collect it. Then go back to the full room view and tap the board with all of the papers on it on the back wall in the center.
Collect your 3rd toe tag. Then back to full room view. Open the locker on the right and collect a round green and red item. You will need this for a mini-game soon.
Tap the trashcan under the desk and you will find a blue key inside. Go to the desktop and collect a wad of paper. Then tap the blue key before tapping the key holder in the far left corner. Add the key to the empty place to activate the mini-game.
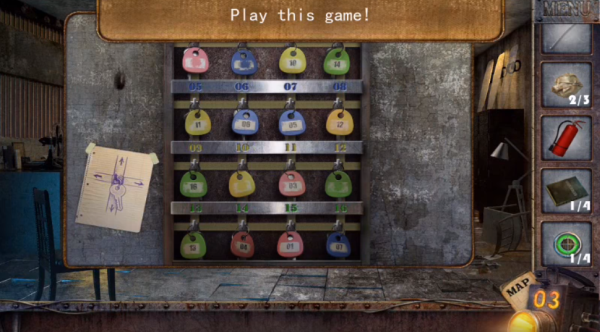
Room Escape Prison Break Key Chain Puzzle
- Column 1 move until blank pink key is in row 1.
- Row 1 move blank pink key to column 2.
- Row 3 move pink 01 key to column 1.
- Column 1 move pink 01 key to row 1.
- Row 4 move pink 04 key to column 4.
- Column 3 more pink 03 key to row 1.
- Column 4 move pink 04 key to row 1.
- Row 3 move green 13 key to column 4
- Column 1 move blank green key to row 3.
- Row 3 move blank green key to column 4.
- Column 1 move blue 05 key to row 2.
- Column 4 move pink 04 key to row 2.
- Row 3 move green 13 key to column 2.
- Column 4 move pink 04 key to row 1.
- Column 2 move blank pink key to row 2.
- Row 3 move green 14 key to column 1.
- Column 2 move green 13 key to row 3.
- Column 4 move green 16 key to row 1.
- Row 3 move green 13 key to column 1.
- Column 4 move pink 04 key to row 1.
- Row 3 move blue 07 key to column 4.
- Column 3 move pink 03 key to row 2.
- Row 3 move blue 07 key to column 3.
- Column 3 move blue 07 key to row 2.
- Column 4 move pink 04 key to row 3.
- Row 4 move blank blue key to column 4.
- Column 4 move pink 04 key to row 1.
- Row 3 move yellow 10 key to column 3.
- Column 3 move pink 03 key to row 2.
- Row 4 move yellow 11 key to column 4.
- Column 3 move pink 03 key to row 1.
- Column 2 move blank pink key to row 2.
- Row 4 move yellow 12 key to column 4.
- Column 2 move yellow 10 key to row 3.
- Row 4 move yellow 12 key to column 1.
- Column 3 move pink 03 key to row 2.
- Row 4 move yellow 11 key to column 3.
- Column 3 move yellow 11 key to row 3.
- Column 4 move green 13 key to row 4.
- Row 4 move yellow 12 key to column 4.
- Column 4 move yellow 12 key to row 3.
- FINISHED
When you finish the puzzle, you will receive a set of keys. Go back to the hallway where you found the bloody lab coat with the hospital keycard. On the right side of the room, there is a door near the bottom of the screen. Use the wire again to open this door. Same rules as before.
Bend the wire at the 3rd and 6th arrow. Then rotate it and insert it further into the lock until the door opens. Tap the door again to enter the room.
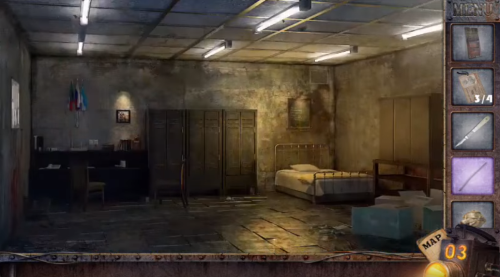 Room Escape Prison Break Level 14
You will see a bed, some lockers, and a desk. Tap the right side of the room and you will see a burning cigarette in an ashtray. Take the green bottle in the box beside the ashtray. Then go back to full room view.
Tap the bed and move the pillow to reveal a book. Take the book and go back to full room view. Tap the locker to open it and take the magnifying glass at the bottom right and the lighter. Click on the desk and you will see a mini-game that has three stacks of books.
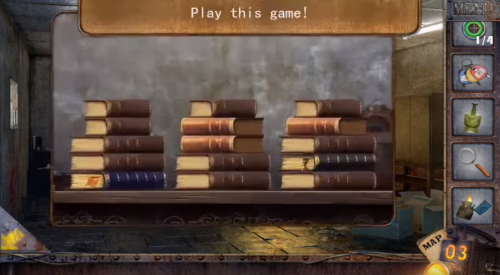 Room Escape Prison Break Book Puzzle
The goal is to get to the two books with the black and blue spines. You have Small, Medium and Large sized books.
- Stack the small books on column 2.
- Move the medium book from column 3 to column 1.
- Move the small books from column 2 to column 3.
- Move the medium books from column 1 to column 2.
- Move the small books from column 3 to column 2.
- Move the large books from column 1 to column 3.
- COLLECT BLUE BOOK.
- Move the large books from column 3 to column 1.
- COLLECT BLACK BOOK.
Once you have collected the 2 books, the game will close.
Tap the board on the far left wall and collect the final toe tag. Then you need to go back to the medical room with the eye chart on the wall and the cadaver.
Tap the toe tags and then tap the eye chart. Use the black numbers to tell you which number in which row. You can use the magnifying glass to see the numbers at the bottom. Then put the numbers in order based on the red numbers. This is a passkey to a door. Number: 8092.
Go back into the hallway with the bloody lab coat and tap the door on the right, before the bate. Enter the numbers 8092 to gain access to this room. Tap the door to enter.
 Room Escape Prison Break Level 15
When you enter the room, you will see a trashcan on the right. Tap it to collect your 3rd wad of paper. Then tap the picture frame hanging on the left wall.
Take the papers, then tap the picture to activate the mini-game. There are six wads of paper at the bottom of the screen.
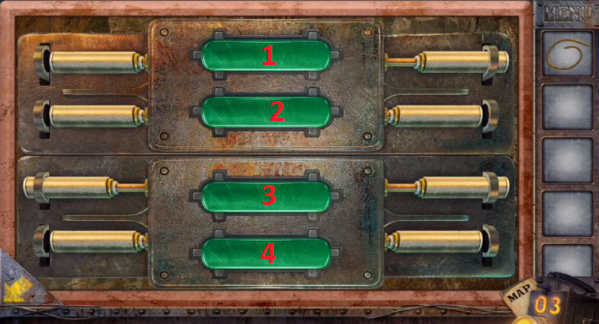
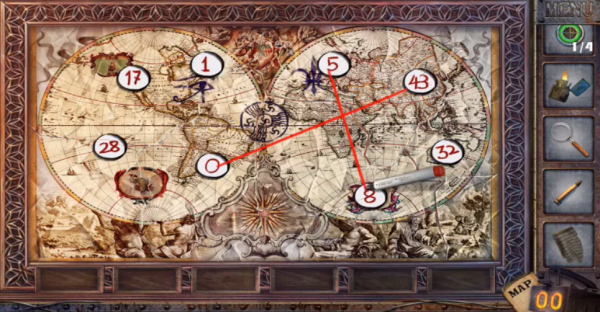
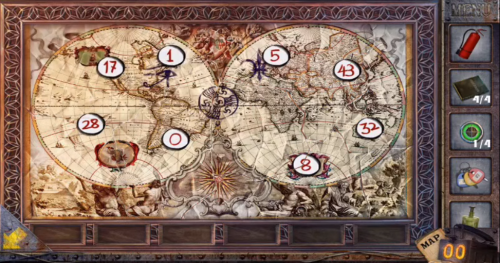 Room Escape Prison Break Map Puzzle
- 1 goes in the top left.
- 2 goes in the top center.
- 3 goes in the top right.
- 4 goes in the bottom center
- 5 goes in the center
- 6 goes in the bottom right.
- FINISHED
When the puzzle is put back together, you will see a map with eight numbers written and circled: 17, 28, 1, 0, on the left and 5, 43, 32, 8 on the right.
Exit the map back to full room view and tap the bookcase in the center back. Add the books you have in your inventory to activate the mini-game.
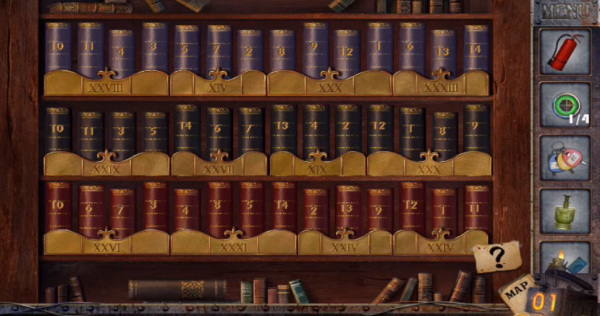 Room Escape Prison Break Roman Numerals Puzzle
The number of books in the sections of 4 should match the roman numerals below it. Book colors cannot mix.
- Blue Books: 10, 11, 4, 3, 5, 7, 2, 8, 9, 12, 1, 6, 13, 14
- Black Books: 10, 11, 3, 5, 14, 6, 7, 13, 4, 2, 12, 1, 8, 9
- Red Books: 10, 6, 7, 3, 4, 8, 5, 14, 2, 13, 9, 12, 11 1
- FINISHED
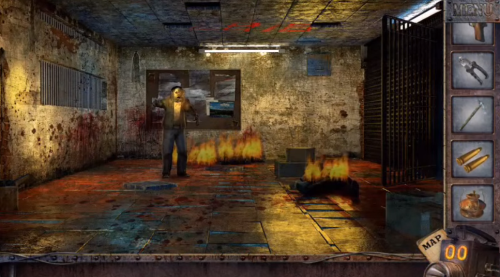
When the books are in order it will go back to full room view. Tap the newly revealed safe to see that you need a palm print and a passkey. Take the figurine from in front of the safe. Then return to the very first room, your cell.
You will see that it is now on fire. Use the fire extinguisher to put out the flames. Then tap the end of the bed and collect the cloth that is hanging there.
Now the cell door is open. Exit the door to the cell block which also has places that are on fire. Tap the cell 3 door on your right and use the keys you collected to unlock the door. Tap the cell to enter.
 Room Escape Prison Break Level 16
On the bed, there is a chess board.
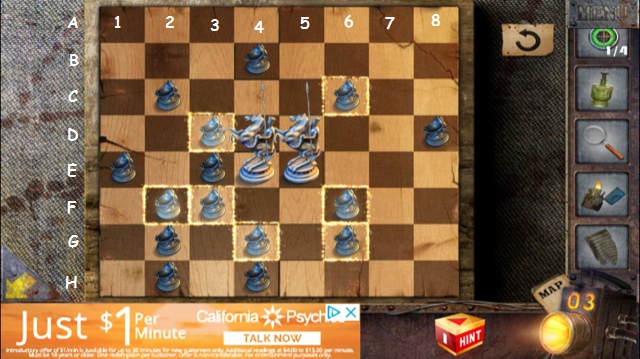 Room Escape Prison Break Chess Board Puzzle
Add the figure you collected at the safe to the board to activate this mini-game. The object is to destroy all of the pawns on the board.
- 6F
- 4G
- 3F
- 2H
- 4G
- 2F
- 6F
- 5D
- 4B
- 6C
- 8D
- 3D
- 1E
- 2G
- 3E
- 2C
- FINISHED
When you are finished, the board will disappear and a playing card and an anchor pin will be revealed. Take both then exit to full room view. Then touch the poster with the soldier making hand motions signals. Remember it for later.
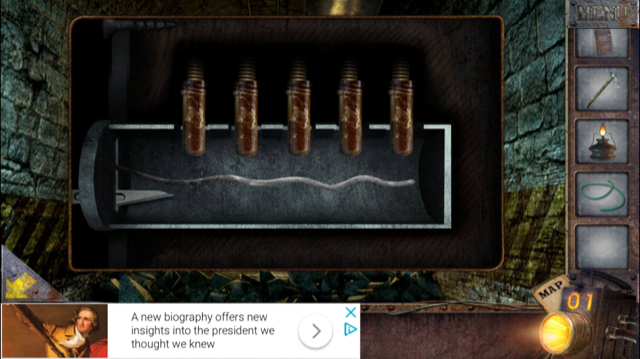
Go back to the room with the colorful bottles and add the bottles that you have collected. Then you have to solve the puzzle. Use the pictures to help you figure out where the bottles go.
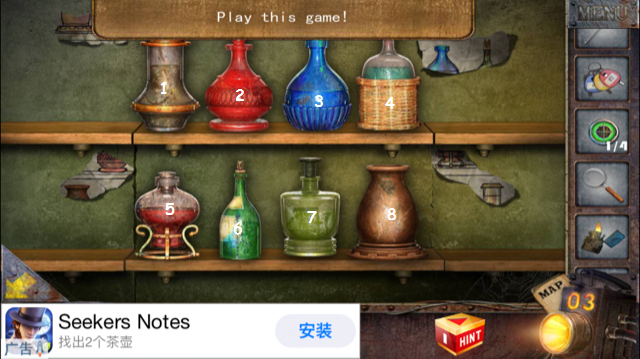
Room Escape Prison Break Bottle Puzzle
Solution:
- Top: 5, 3, 6, 2
- Bottom: 7, 1, 8, 4
- FINISHED
When they are in the right order, the bottom shelf will lower and you will be able to collect a bullet. Then go back to full room view. Go back to the burning cell block and use the keys you have to unlock cell 2 on the left side of the screen.
 Room Escape Prison Break Level 17
Enter the room and tap on the bed to look at a box with different symbols and holes. Add the anchor you found before to the box to activate the mini-game.
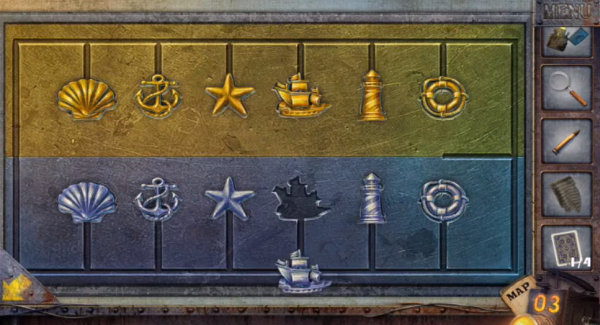 Room Escape Prison Break Medal Puzzle
You have to get the pieces in the right slot by color and shape.
- Blue anchor to slit.
- Gold star to place.
- Blue shell to blue lifesaver slot.
- Blue anchor to home.
- Gold lighthouse to slit.
- Blue star to place.
- Blue lifesaver to blue ship slot.
- Gold lighthouse to place.
- Blue lighthouse to slit.
- Gold anchor to place.
- Gold lifesaver to gold shell slot.
- Blue shell to place.
- Blue lighthouse to blue lifesaver slot.
- Blue ship to slit.
- Gold lifesaver to place.
- Gold ship to Gold shell slot.
- Blue lifesaver to blue lighthouse slot.
- Blue ship to place.
- Blue lifesaver to slit.
- Blue lighthouse to place.
- Blue lifesaver to place.
- Gold ship to slit.
- Gold shell to place.
- Gold ship to place.
- FINISHED
The lid of the box will the open, revealing a playing card and a red T-shaped piece. Take them both. Look at the poster over the bed. It has dots and dashes on it and a ship. Remember for later.
Exit the cell to the cell block and use the key to unlock cell 4 on the left.
 Room Escape Prison Break Level 18
Enter the cell and you will see a puzzle on the far right wall. Add the red t-shaped piece you found to activate the puzzle.
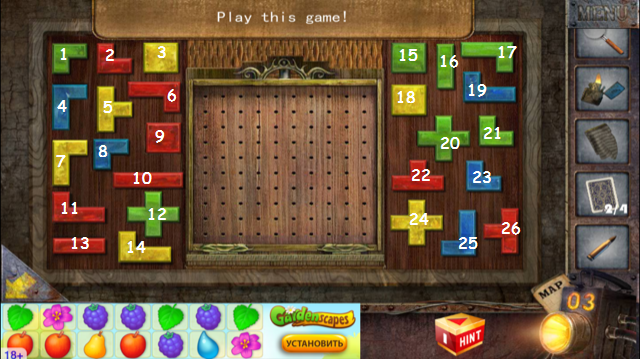 Room Escape Prison Break Tetris Puzzle
All pieces must fit on the screen with no holes, like a Tetris board.
Top to bottom:
- 1, 10, 3
- 26, 5, 17, 4, 19
- 14, 12, 9, 25, 16
- 7, 8, 20, 6, 15
- 22, 24, 21
- 2, 13, 11, 18
- FINISHED
When you finish the puzzle, it opens to reveal a playing card. Take it and exit to full room view. Then tap the shelf beside the door. There is a newspaper with a playing card inside.
Take the card and exit to full room view. Tap the playing cards to place them together to show the numbers 43, 0, 8, 5. Take the stool with the cups and collect the pen.
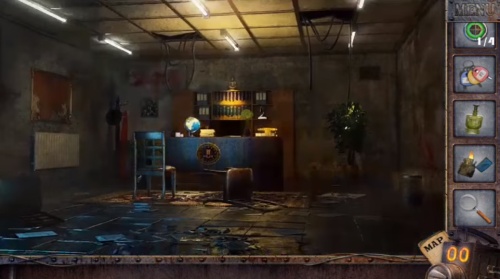
Room Escape Prison Break Level 19
Go back to the office with the map and the numbers. Tap the map to view it. Use the pen to draw a line from 43 to 0 and from 5 to 8. Where they cross, there is a black circle.
 Use the magnifying glass to look closer and you will see the numbers 27359 with a circle divided into three sections of red, yellow and green.
Go back to the hallway with the bloody lab coat. Tap on the right side of the gate to access a locked door. You will see the same green, yellow, and red circle.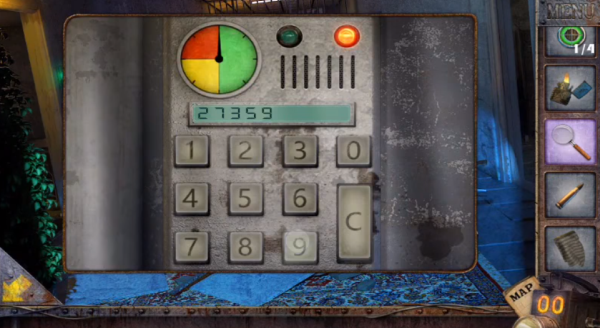
Enter the passcode: 27359. Then tap the room to enter.
 Room Escape Prison Break Level 20
You will see a cell. Tap inside the cell and you will find a body on the floor with a piece of paper in the jacket pocket. Take the paper.
Then use the scalpel to cut at the wrist of the right arm and remove the hand. Then pick up the hand. You need it for the hand print scanner. Then exit this scene. Tap the desk and collect another green and red circle looking piece.
Go back to the room with the hand print scanner. Tap the hand print scanner to zoom in. Then tap the hand and tap the scanner again.
Go back to full room view and tap the desk. Open the book with the face and the glowing eyes. You will see a list of numbers on the right and a beast on the left. Use the paper you took out of the dead body’s pocket. Lay it over the book to reveal the numbers 37541.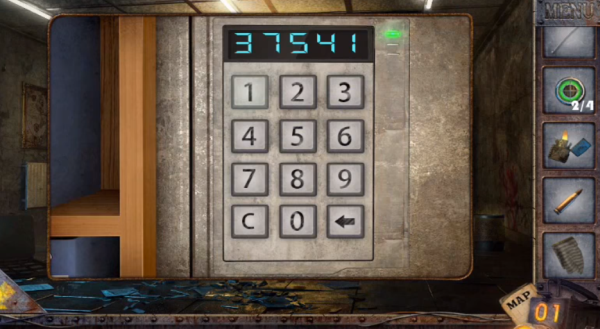
Go back to the safe and input this code. The safe will open. Collect the gun and leave.
Combine the bullet with the gun. Then go back to the room with colored bottles. Tap the gate in the back center of the screen, it has the number 216 written on it. Use the gun to shoot off the padlock. Then continue through the gate.
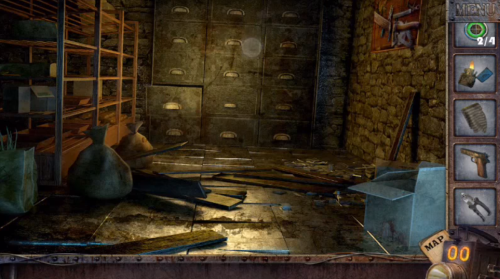 Room Escape Prison Break Level 21
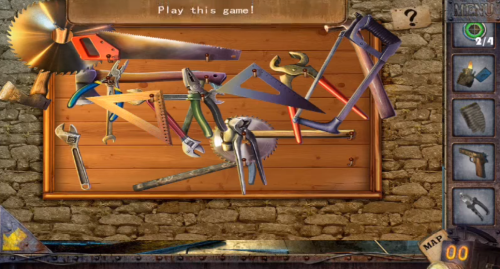
In the new room, on the right wall, there is a pile of tools. Tap on it to activate the puzzle. Match the tools with their identical tool. Example, find two saw blades, two pairs of pliers, two hammers, etc. When you finish the puzzle, a pickax will be added to your inventory.
Next, tap on the boxes on the shelf to the left to find the 3rd green and red circle piece. Then tap on the wall to the right to zoom in. Use the pickax to break through the wall to reveal another puzzle.
Go back to the full room view and tap the filing cabinets in front of you at the bottom left corner. Take the pair of wire cutters from the draw. Then go back to the puzzle in the hole in the wall.
Use the wire cutters to activate it. The wire cutters will remove the wires that are preventing you from moving the handles. To solve the puzzle, you have to tap the handles in order.
 Room Escape Prison Break Safe Puzzle
Turn them in this order:
- 4
- 1
- 2
- FINISHED
Take the 2 bullets and turn the crank on the back of the inside of the safe. This will open a door at the file cabinets. Go through the door but you will discover that it is too dark to see.
Use the lighter you collected to light the two torches in the room. One on the top left, the other on the top right. The room will brighten and you will see a skeleton and several skulls.
 Room Escape Prison Break Level 22
Tap the skeleton and take its skull. Tap the stone in the middle of the floor to activate a puzzle. You must connect all of the skulls where no bone is left with another touching it. The eyes will light up on the skulls when they are in the right place. Tap the skull to rotate it.
See picture below for the finished puzzle: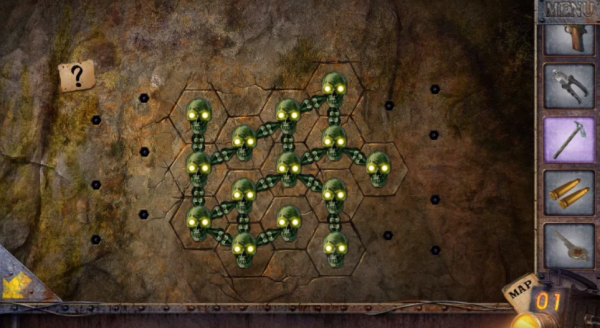
When you finish the puzzle, the ground opens and a beast jumps up into the room. Take a minute to tap the skull and the pickax. Break open the skull to find a key. Exit the room and go to the room with the brain scans and the cadaver.
You can’t do anything with the beast yet. But you can go open the locker on the left side of the screen using the key you just found. Take the burner and the bottle of C2H6O. Then go back to the room with the beast.
Tap the bottle of C2H6O and remove the lid. Take the cloth you have been carrying from your cell and put it in the bottle. Then use the lighter to light the cloth and create a fire grenade.
Tap the grenade and throw it at the beast. The beast will vanish and drop a piece with a red and yellow triangle on a blue circle. Pick it up.
Go back to the cell block with the fires and tap on the gate at the end of the block. Tap the lock to zoom in. Place the red and yellow triangle piece in the center of the lock to activate the puzzle.
 Room Escape Prison Break Cell Lock Puzzle
To solve this puzzle, you need four number and they can all be found in things you have already seen.
- First, the clock above the gate in the in the cell block says 3:00 with a 1 printed on it. This is the first number.
- Second, in cell 2, the dots and dashes on the poster with the ship. The ship says – *** which is 6 in Morse code.
- Third, in cell 3, the poster with the soldier, his hand is signaling the number 7.
- Forth, in cell 4, the painting of the horses has 8 horses.
Tap the numbers: 3678 and the gate will unlock and open. Continue through the gate.
 Room Escape Prison Break Level 23
You will find another creature standing in front of you. Load the gun and shoot the creature twice and it will disappear. Then tap the gate to your right to enter a new room.
Tap the green trash bin and you will find a wooden triangle on top. Pick it up. On the wall on the far right, there is a jigsaw puzzle you need to solve. Add the missing triangle to activate the puzzle.
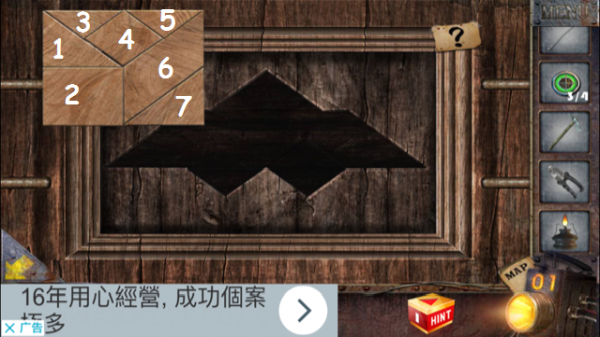 Room Escape Prison Break Jigsaw Puzzle
Rotate the piece by tapping them and fill in the shape in the center of the screen. See pictures for solution.

When you solve the puzzle, the box will open and you can collect the last red and green circle piece. Then go back to the room you enter after you leave your cell. There is a chained up gate on the right side of the screen.
Tap the gate with the chains and add the 4 missing circular pieces from your inventory. This will activate the puzzle.
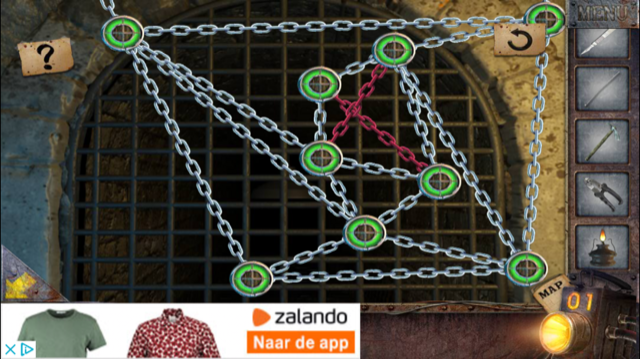 Room Escape Prison Break Chain Puzzle
To solve the puzzle, you have to get all of the chains to turn silver by making sure none of them are crossing. Tap the question mark on the right for a hint of how to solve the puzzle.
Once you have finished the puzzle, the gate will open. Go through the gate and discover a hallway.
Tap the gray box on the left wall. Use the wire cutters to open the locked box. Tap the blue wire to pick it up. Then go back to the hallway.
On the right side of the screen, there is a metal panel. Tap it. Insert the scalpel, then the wire into the lock and tap it to activate the next puzzle.
Room Escape Prison Break Lockpick Puzzle
Tap the piece from in this order from left to right: 1, 2, 4, 5, 3
Then the panel will unlock and you can enter the next room. Tap the burner you have in your inventory. Then use the lighter to light it.
Tap the open metal panel on the top left side of the screen and set the burner inside so you can see. Add the blue wire you took from the hallway to activate the puzzle.
The goal is to move all of the wires so that you can turn on all of the lights at the top of the screen.
Room Escape Prison Break Wires Puzzle
From top to bottom:
- 1st hole blue, 6th hole yellow
- 1st hole long green
- 3rd hole purple, 9th hole short green
- 2nd hole red
FINISHED
When you finish the puzzle, the lights will turn on in the room. Tap what looks like a hallway entrance on the left sit of the screen. This will zoom in and you will see a puzzle box. Tap the box to activate the puzzle.
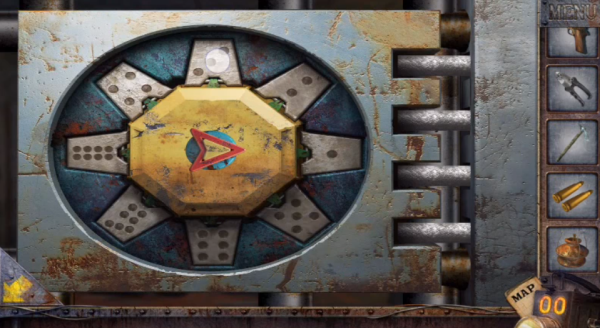
 Room Escape Prison Break Pipe Puzzle
You must connect the pipes buy rotating them and using the knobs to shift it. The pipes have to be matched to the correct color connection and pipe. See picture for completed puzzle.
Next, tap the hallway entrance on the right side of the screen. Lay the door you have in your inventory in the middle of the floor.
Then use the pickax to break the wall at the weak point at the end of the door on the left side of the screen.
Tap the hole to enter and you will see a puzzle on the wall in the center. Tap the puzzle to activate the game. Once you solve the puzzle, you will see that it is a sign telling you to go left.

Tap the left hallway you will be in a new room. Tap the top of the ladder to activate the last puzzle. Click the hint to see what the puzzle is supposed to look like.
The object is to move all of the pins out of the circle. Every time a pin is moved in or out, the other pins rotate one space to the left. Tap the pins in this order:
5
1
6
4
7
1
8
3
8
1
8
2
FINISHED
Once you have solved the puzzle, the hatch will open and you are free to leave.
Congratulations, you won the game. You are free!